
All the water slide parks near Metro Vancouver to visit this summer
HOME BUYERS – To get the best exclusive listings visit www.vreg.ca and go to “EXCLUSIVE DEALS”

The Western Family Summer Guide is here to make summer fun and easy! Whether you’re having a BBQ, going on a picnic or road trip, planning a backyard dinner, or throwing an ice cream party, we’ve got everything you need to make this summer the best one yet.
Summer temperatures may be heating things up in Metro Vancouver, but a trip to a nearby water slide park can help you stay cool throughout the season.
Visiting the water slides is fun for the whole family. There are thrilling water features, relaxing lazy rivers, hot tubs, and more. And let’s not forget the delicious concession stand serving nostalgic favourite treats and eats.
There are several waterparks just a short drive away that are ready to help you make a splash. So if you’re ready to get wet and wild, here are all the water slide parks near Metro Vancouver to visit this summer.
Big Splash Water Park
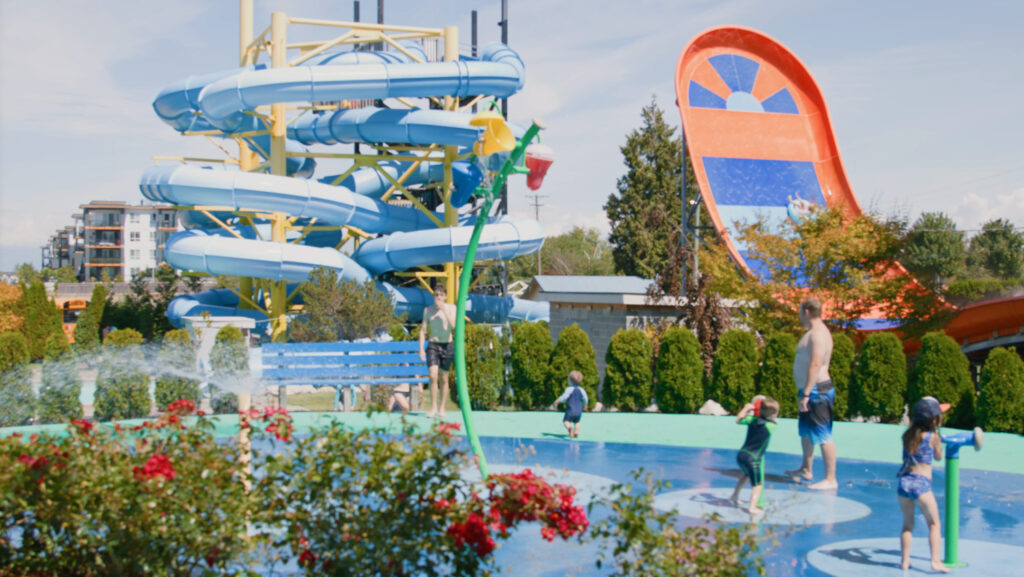
Big Splash water park
What: Big Splash Water Slide Park in Tsawwassen has reopened for the summer season. The seven-acre resort-style park features 13 body and tube slides, a kids’ zone, hot tubs, and more to help you beat the heat.
Big Splash’s highlight is the Boomerango, an exhilarating tube slide with a six-story drop. According to the park, it’s the only one of its kind in Western Canada.
When: Now until Monday, Sept. 1, 2025
Time: 11 a.m. to 6 p.m., weather permitting
Where: 4775 Nulelum Way, Tsawwassen
Admission: $41.99 for an all-day pass and $32.99 for a twilight pass, which begins at 3 p.m.. Children three and under are free with a paying adult. Purchase online
Cultus Lake Waterpark

Cultus Lake Waterpark/Facebook
What: Adventurous sliders will want to slap on the waterproof sunscreen and enjoy the Valley of Fear or the Freefall Tower. Families and young ones can also experience Tots’ Castle, Pirates Cove, and Western Canada’s biggest water slide, the Colossal Canyon family raft ride!
After you’ve built up an appetite, grab some food from the in-park vendors, including the refreshing pineapple Dole Whip soft serve. Then relax at one of the 150+ shade and shelter picnic areas.
When: Now until Monday, Sept. 1, 2025
Time: Various times
Where: Cultus Lake Waterpark – 4150 Columbia Valley Hwy., Cultus Lake
Cost: Various, purchase online
Bridal Falls Waterpark
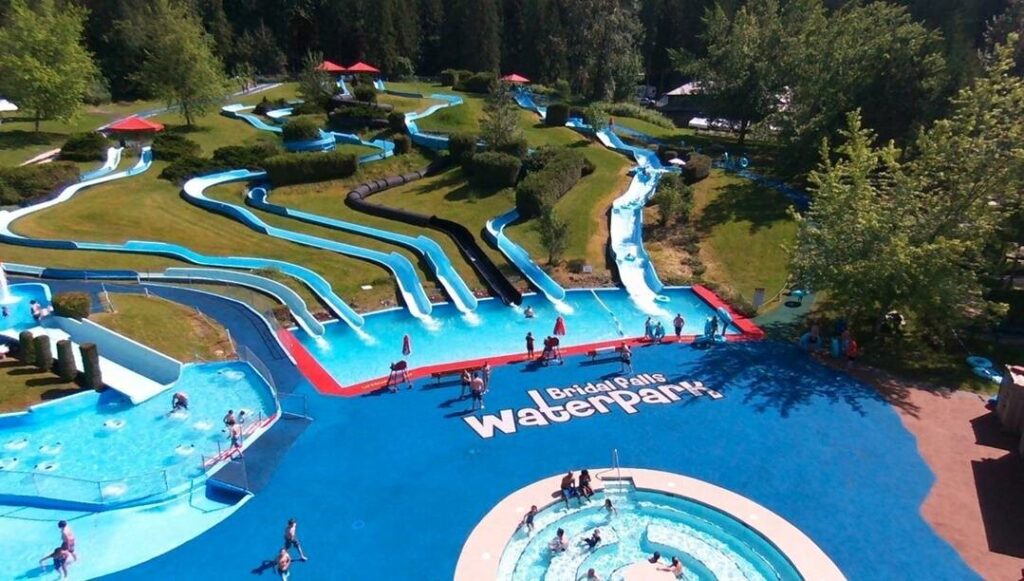
Bridal Falls Waterpark/Facebook
What: Bridal Falls Waterpark is helping visitors get wet and wild daily until Monday, Sept. 1. Just a 90-minute drive from Vancouver, the popular Fraser Valley destination is designed for families, so young water lovers will have just as much fun as adults.
When: Now until Monday, Sept. 1, 2025
Time: 11 a.m. to 6 p.m.
Where: 53790 Popkum Rd. S., Rosedale
Cost: $10 per person; children two and under are free. Purchase online
Harrison Lake Inflatable Water Park
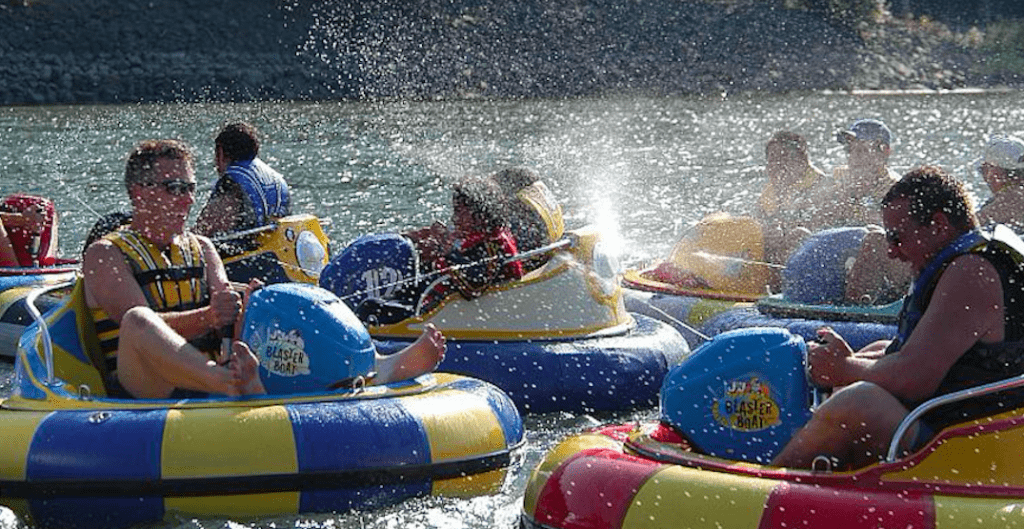
Harrison Watersports
What: Harrison Watersports’ huge attraction not only has an epic floating obstacle course/playground on the lake, but you can also rent BBQ boats and Sea-Doos for the ultimate lake trip.
In 2022, a “Wipeout Style” obstacle course was added, with swings, teeter-totters, hamster balls, monkey bars, and the popular Blob. You can also rent a bumper boat, which is complete with water guns that squirt from 10 ft. away to let you soak your friends.
When: Open daily from June 21 until Aug. 31, 2025
Where: 100 Esplanade Ave., Harrison Hot Springs
Tickets: Available online from $39.99. Book online


